


Greetings and welcome to Flumotion Smart Multi CDN! The primary objective of this guide is to aid new users, like yourself, in rapidly implementing a Multi-Edge platform strategy utilizing Flumotion Smart Multi CDN. Our intention is to assist you in improving the reliability and performance of your websites and applications while also reducing the cost of your edge services. Our primary aim is to assist you in unlocking the full potential of the Flumotion Smart Multi CDN platform.
1. Create an account on Flumotion Smart Multi CDN #
Please feel free to contact us by sending an email to support@ioriver.io or booking a demo through our website at www.ioriver.io. We would be delighted to create an account for you.
Once your account is created, the Flumotion Smart Multi CDN support team will provide you with a username (email) and password that you can use to access the Flumotion Smart Multi CDN platform.
2. Login to Flumotion Smart Multi CDN management console #
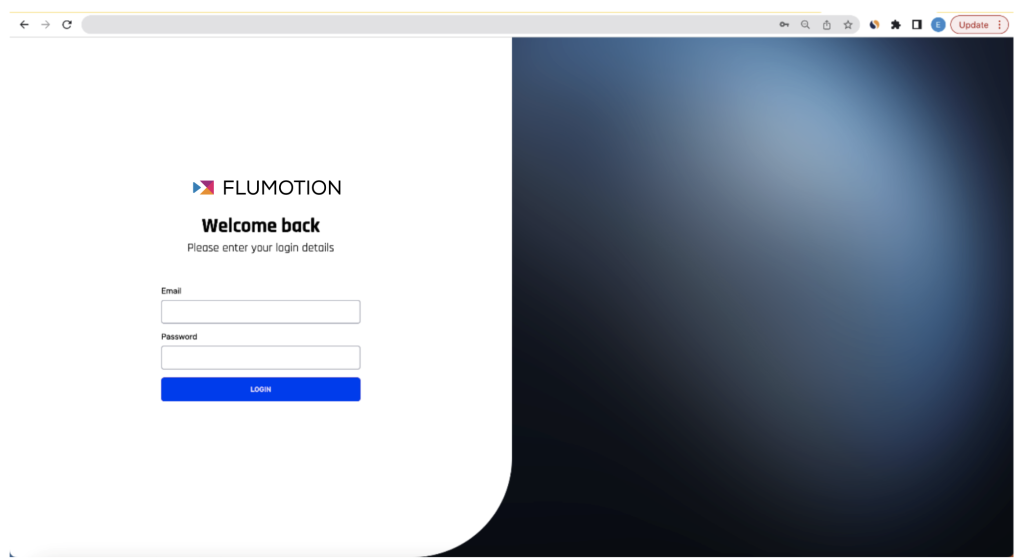
Please browse to the Flumotion Smart Multi CDN website at www.ioriver.io and click on the «Login» button:
3. Upload your certificate #
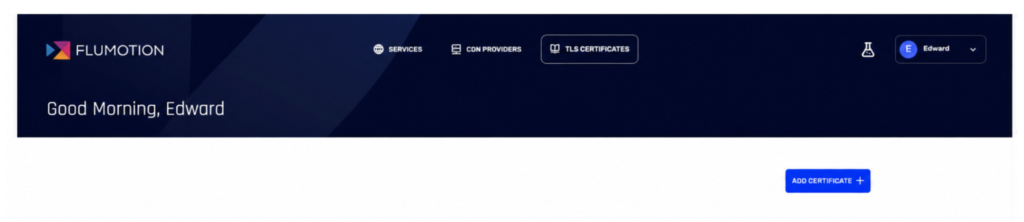
Please upload your certificate to Flumotion Smart Multi CDN, Flumotion Smart Multi CDN will upload your certificate to all chosen CDNs / Edge platforms. Choose “TLS CERTIFICATES” tab and click on the “ADD CERTIFICATE” button:
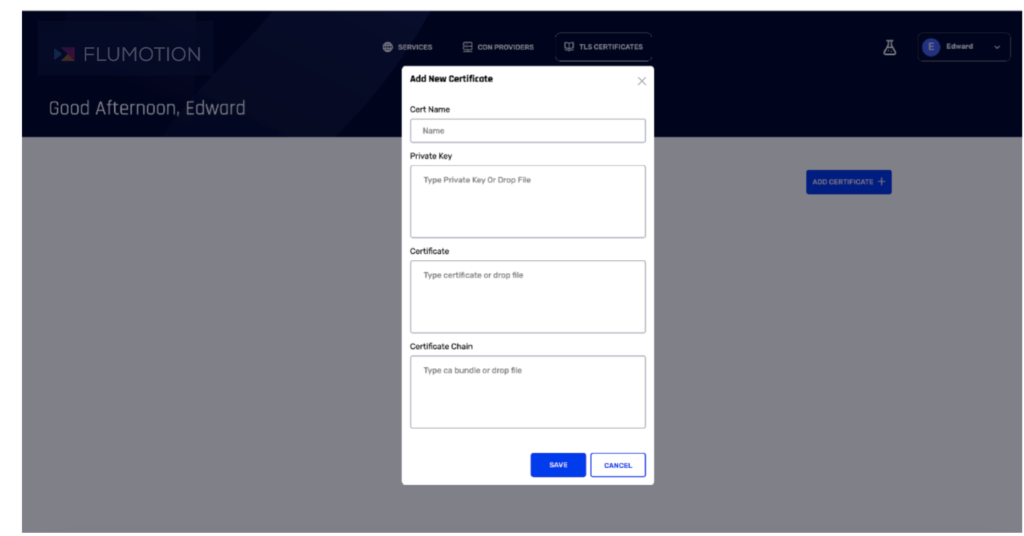
Please enter the certificate name, private key, certificate itself, and the certificate chain. Please note that all fields are mandatory. Once you have entered the required information, click on the «SAVE» button to proceed.
4. Connect your CDNs / Edge vendors #
Please select which CDN/Edge platforms you would like to utilize. At present, Flumotion Smart Multi CDN supports the following platforms:
- CloudFlare
- CloudFront
- Fastly
- Akamai
- Azure CDN
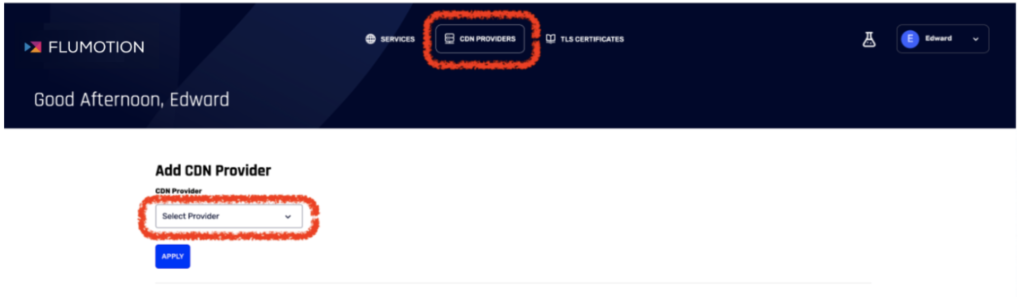
To choose a CDN provider, click on the «CDN Providers» tab and select the desired provider from the dropdown menu:
For each provider, you will need to specify the required access details, such as access token. Here’s how you can create the necessary access token for each CDN provider:
- Create an API User in Akamai
- Create an API Token in Cloudflare
- Create a CloudFront Role in AWS
- Create API Token in Fastly
Once you have entered the necessary access token details, click on the «APPLY» button to proceed.
5. Create your first service on Flumotion Smart Multi CDN #
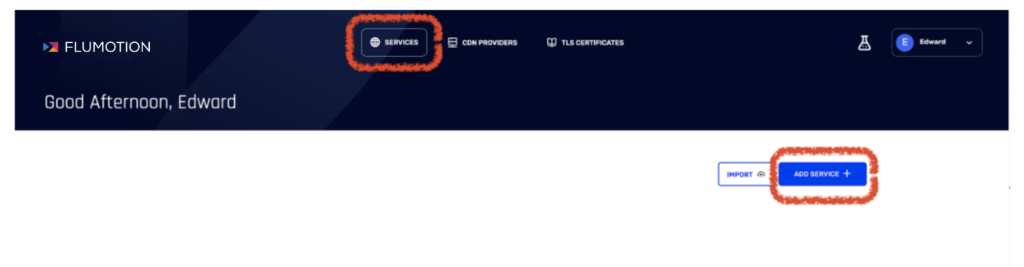
A «Service» in Flumotion Smart Multi CDN represents a portion of your traffic and is equivalent to a CloudFlare website, a CloudFront distribution, a Fastly service, and so on. To create a new service, please click on the «SERVICES» tab and then click on the «ADD SERVICE» button:
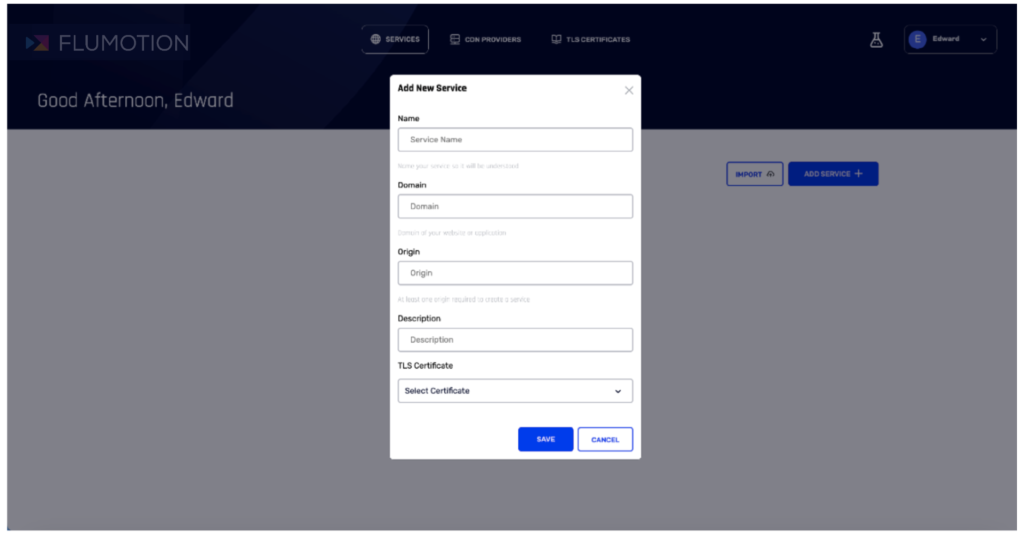
Please specify your service name, domain name, domain to your origin, description, and choose your predefined TLS certificate:
6. Select which CDN providers will serve your service #
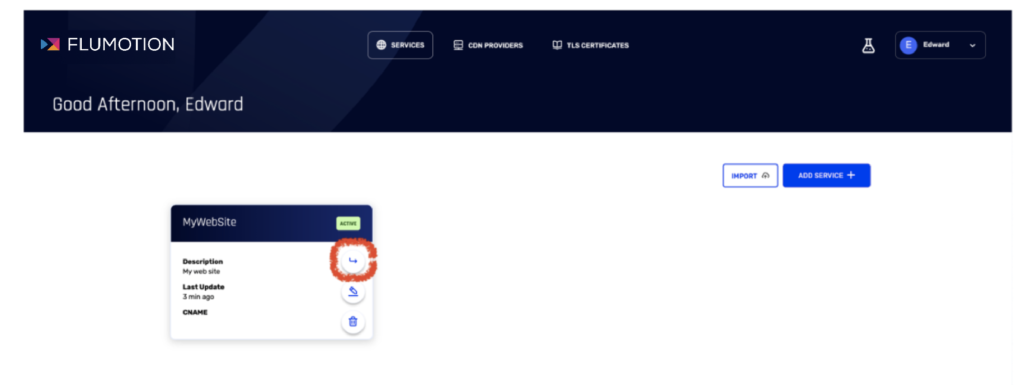
To access your created service, please click on the drill-down icon located inside the service. The drill-down icon will appear once you hover your mouse over the selected service:
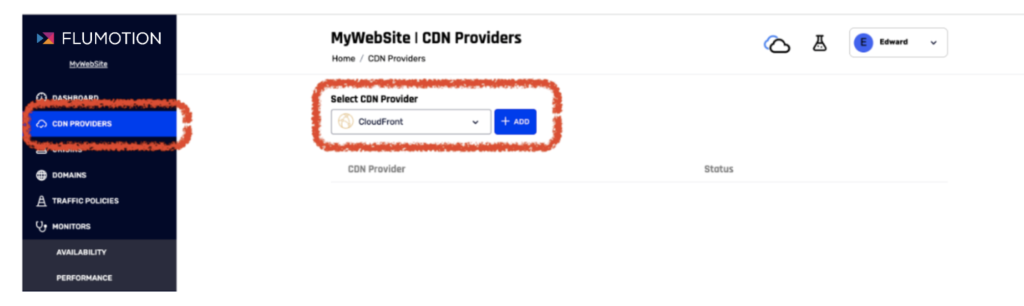
Select the «CDN Providers» tab and choose from the dropdown menu which providers to add. Please use the «ADD» button to add the providers to your service.
7. Distribute the traffic across chosen CDN providers #
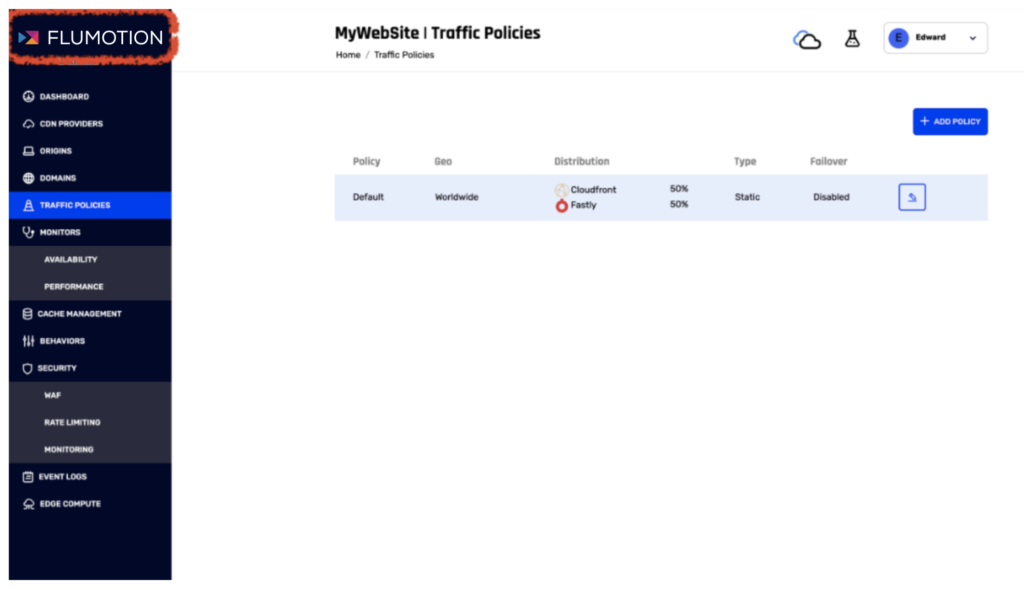
Configure the default traffic policy via the «TRAFFIC POLICIES» tab:
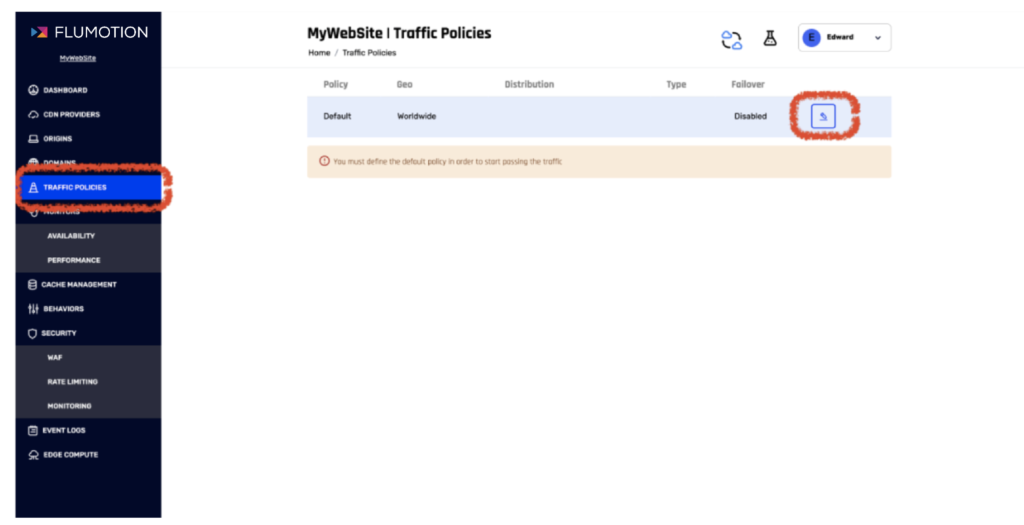
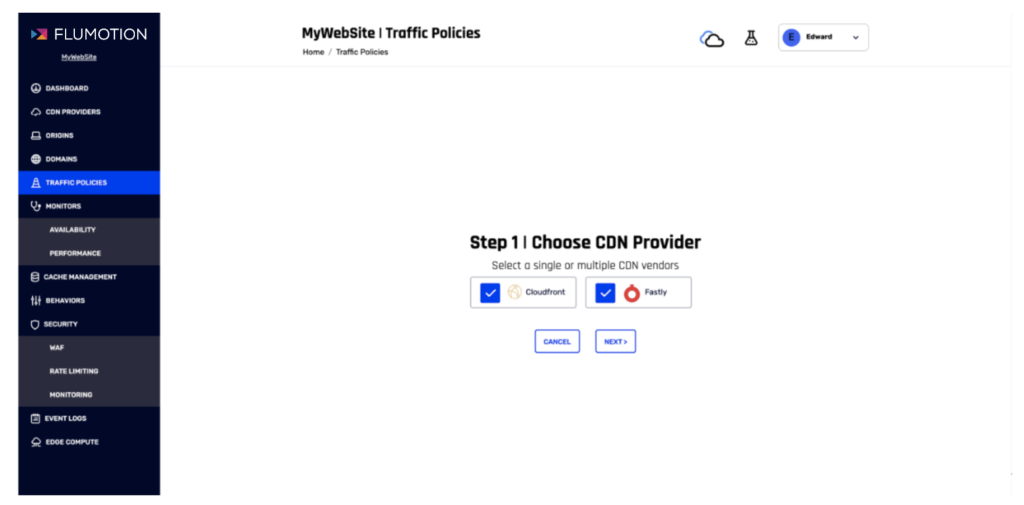
Select which CDN providers you would like to serve your service by default (across all geographies):
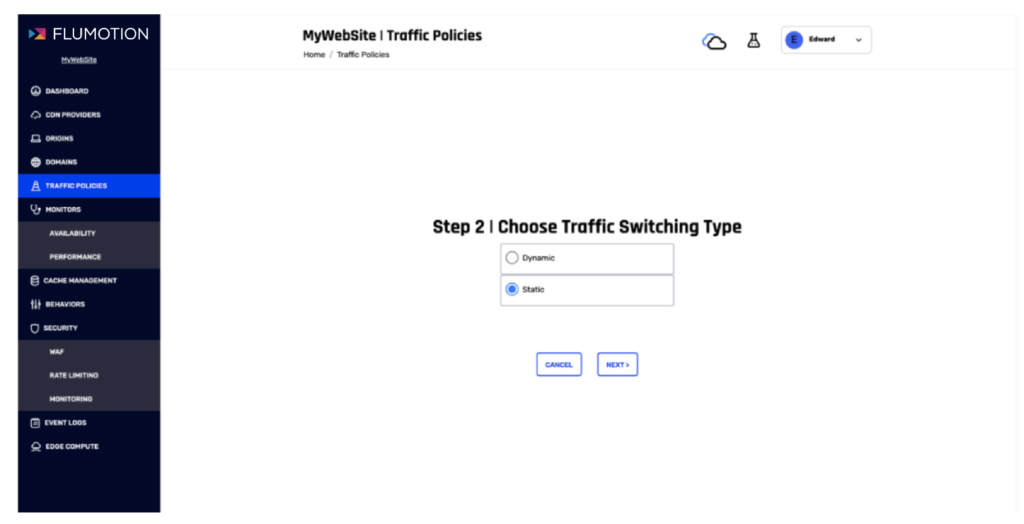
Choose which traffic switching method will be used to distribute traffic between the chosen vendors. Flumotion Smart Multi CDN supports two methods:
- Dynamic – Based on performance (latency) of the CDN providers in chosen geography
- Static – Based on static distribution of traffic between the chosen vendors In this article, we will choose to switch traffic by static method. More information regarding the traffic policies could be found in “Traffic Policies” article.
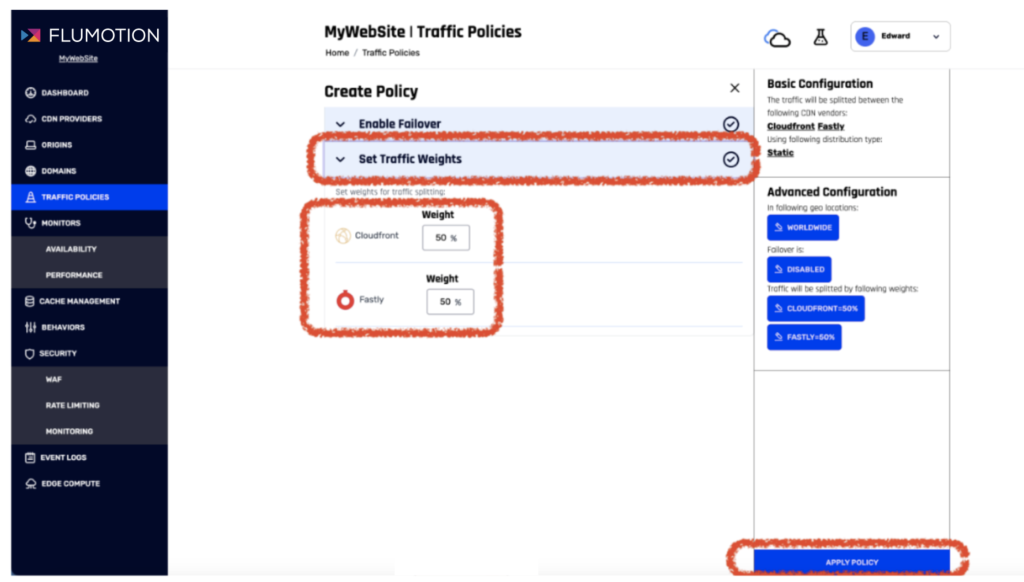
Set the traffic weights (totaling 100%) for your chosen CDN providers, and click on the «APPLY POLICY» button to proceed.
8. Integrate with your DNS #
Your service is ready for integration with DNS. Return back to main “SERVICE” tab clicking on “FLUMOTION SMART MULTI CDN” logo:
Copy the Flumotion Smart Multi CDN CNAME for your service:
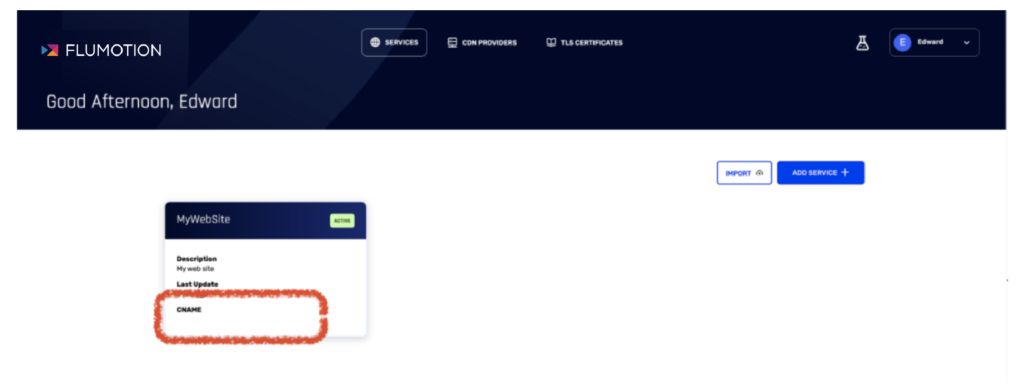
Configure the Flumotion Smart Multi CDN CNAME as a CNAME to your DNS name.
Congratulations! Your first Flumotion Smart Multi CDN service is ready for use.